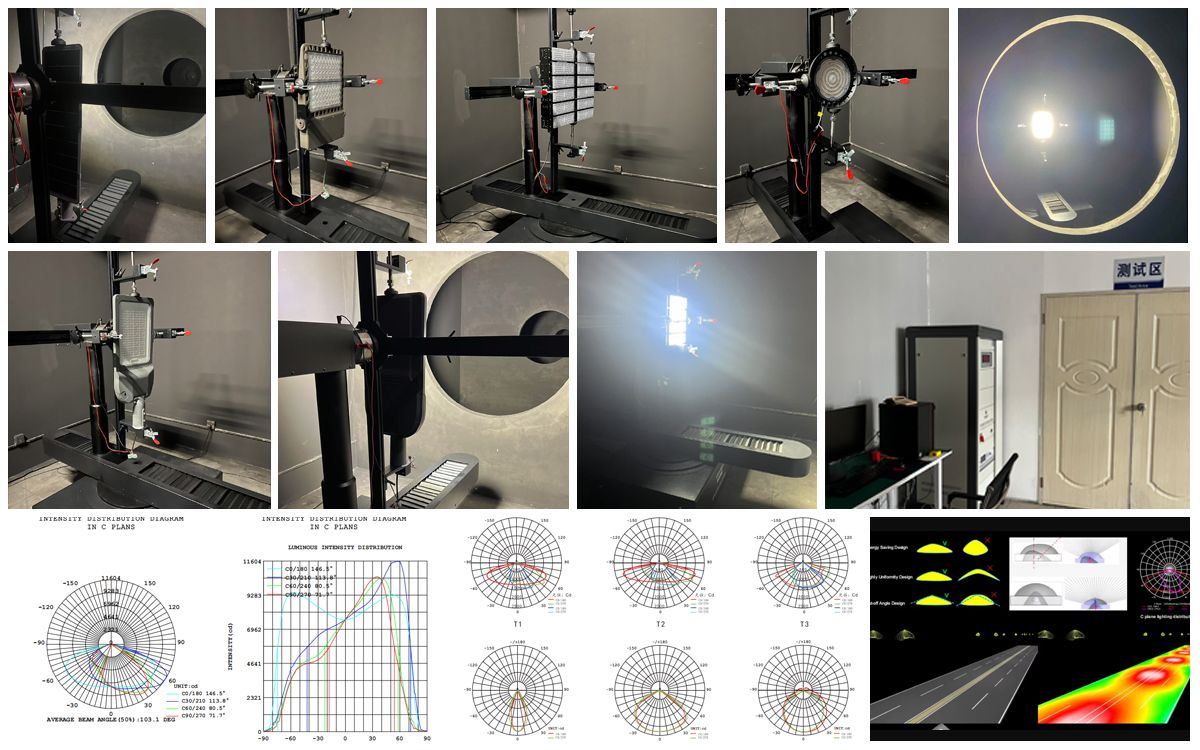
How to Ensure Precise LED Lighting Effects Through IES Testing
In the development and application of high-performance LED lighting products, the accuracy of lighting effects depends not only on the quality of the light source itself but also on the scientific verification of optical properties. The IES test (Illuminating Engineering Society Test), an internationally recognized method for measuring photometric distribution, is a key step in ensuring that the optical performance of LED lamps meets design objectives. This article will explain how to use this test to ensure precise and consistent LED lighting effects, from the perspectives of its principles, processes, key parameters, and application value.
I. Definition and Significance of the IES Test
The IES test is a standardized optical testing method based on light distribution curve measurement. It generates a photometric data file (IES file) that conforms to the IESNA (Illuminating Engineering Society of North America) standard format. This file fully describes the optical characteristics of a lamp, such as light intensity distribution, luminous flux, and beam angle, providing designers, engineers, and end customers with scientific, quantifiable optical data references.
The main significance of IES testing lies in:
Accurately verifying optical designs
Confirming whether the actual light distribution meets the design objectives (e.g., Type I, II, and III light distribution for road lighting).
Provides a foundation for lighting simulations.
IES files can be directly imported into lighting design software such as Dialux and AGi32 for scene simulation.
International Trade and Certification Requirements
Most international lighting project bidding projects require a light distribution file that complies with the IES standard as a basis for evaluation.
II. Core Process of IES Testing
1. Test Environment Preparation
Darkroom Environment: Ensure there is no reflection interference. Walls are typically painted matte black.
Temperature and Humidity Control: Stable environmental conditions prevent temperature-dependent fluctuations in LED luminous flux.
Lamp Preheating: Generally, a 30-minute preheating period is required to ensure stable light output.
2. Test Equipment
Goniophotometer
Common types include Type C (rotating mirror) and Type A/B (rotating lamp). They are used to measure light intensity distribution at different angles.
Precision Photometer
Features high sensitivity and low drift performance, ensuring measurement accuracy.
Control and Acquisition System
Records light intensity data in real time and automatically generates IES files.
3. Test Steps
Installation and Positioning: Secure the luminaire to a turntable or fixture, ensuring that the optical center aligns with the axis of rotation.
Angle Scanning: Perform full-range scans at preset angle intervals (e.g., every 2° or 5°).
Data Collection and Correction: Collect light intensity data and apply compensation corrections for temperature, current, and other factors.
Generate an IES file: This file contains the light intensity distribution table, beam angle, maximum intensity position, and total luminous flux.
III. Key Optical Parameters in the IES File
Luminous Flux
Unit: Luminous flux (lm) reflects the overall light output of the luminaire.
Light Distribution Curve
Describes the variation in light intensity at different angles, directly affecting lighting uniformity and glare control.
Beam Angle
The angle at which light intensity drops to 50% of its maximum value determines the illumination range.
Direction of Maximum Intensity
Used to correct the installation angle to ensure optimal lighting results.
Luminous efficacy (lm/W)
An important metric for comprehensively evaluating the energy efficiency of light sources.
IV. Key Points for Ensuring Accurate Test Results
Calibration Equipment
Regularly calibrate using a photometer and standard lamp traceable to national metrological standards.
Consistent test conditions
Including input voltage, drive current, and ambient temperature to avoid fluctuations in test data.
Realistic Luminaire Conditions
Tests should use mass-produced versions, rather than laboratory-adjusted samples, to reflect true performance.
Measuring Density at Multiple Angles
For scenarios with demanding lighting distribution requirements (such as sports lighting), the angle interval should be smaller (1°–2°) to improve resolution.
Data Verification and Comparison
Compare with the design simulation value. If the deviation is significant, review the optical design or production process.
V. Application of IES Testing in Actual Projects
Road Lighting Projects
Use IES testing to ensure that Type II/III lighting distribution meets roadway uniformity, glare control, and illumination standards.
Stadium Lighting
Precisely control the light spot position and spill light to reduce light pollution to surrounding residents and the environment.
Industrial Lighting
Ensures uniform brightness in high-altitude work environments, improving worker safety and visual comfort.
VI. Conclusion
IES testing is not only a technical threshold for LED luminaire export or project acceptance, but also a core tool for manufacturers to ensure accurate lighting effects and earn customer trust. Only by strictly controlling testing conditions and accurately collecting optical data can the ideal lighting effects on design drawings be faithfully reproduced in actual scenes. For LED lighting companies striving for high quality and international competitiveness, integrating IES testing into the entire product development and quality control process is an indispensable competitive strategy.
